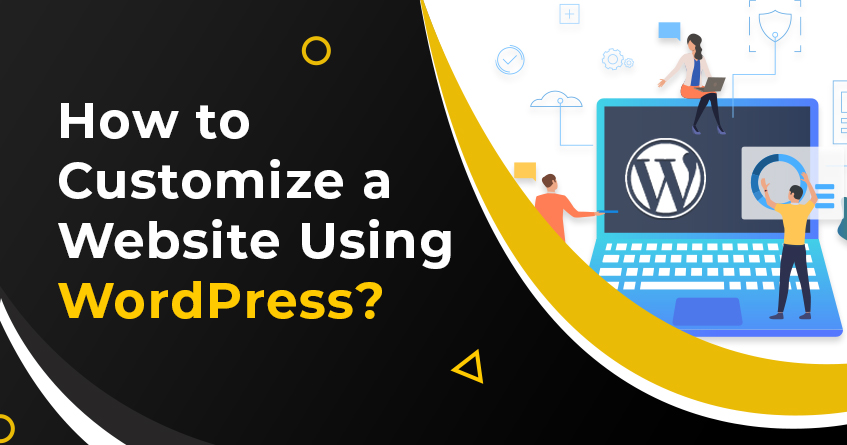
Building a website requires much more than merely designing a logo and adding a menu, a sidebar, a footer, and content. The components of this jigsaw must first be formed, and this too requires training and practice like everything else. The site design you build must strike the ideal balance between design and function, committed to ensuring a positive user experience. Although there are some factors to consider during this process, this does not require a PSD to WordPress expert. With the help of this article, you’ll be ready to take on the task yourself and ready to do some serious website designing.
You will need to perform comprehensive research to produce a website design that effectively ticks all the boxes of aesthetics and usefulness. First and foremost, who is your main demographic and what do they like to see? These are definitely important components of your study.
Another area of website designing that you should investigate is the strategies used by your competitors. These competitors are almost definitely more experienced than you are, so you are likely to learn a thing or two from their design! You should begin worrying about functionality when you’ve done your homework and have a clear notion of how your site should operate. Put everything pen to paper once you have figured it out. Trace and outline what you want your website to look like so you can keep track of it as you go.
You’re ready to fire up Photoshop once you’ve completed the physical sketches. It will be easier for you or your front-end developer whoever will be building the HTML and CSS to produce an optimized, responsive layout if you use a column-based grid to establish an aligned design.
Once you’ve designed a site design that you’re fully impressed with, the PSD to WordPress template conversion is essentially what’s left to be done.
HTML5 and CSS3 are used to build all websites nowadays and are considered superior to XHTML and CSS2. The buttons, borders, gradients, rounded corners, and other characteristics are built as core functions of the CSS3 coding rather than as images. As a result, slicing the PSD file now essentially only entails slicing the PSD’s background pictures. Examine the website’s design for any images that might require slicing which means images that can’t be made with CSS3, such as the logo and background images. Use CSS to replace these background images to significantly reduce site load speed. Long loading times hamper traffic to your website, and thus doing this would bring a wide audience to your website.
It’s necessary to generate the HTML5 and CSS3 after you’ve cut the graphics from your PSD version. The first step is to create a new folder in which index.html and style.css will be created with a subdirectory for the images. Also, make a new folder to keep track of all of the JavaScript and jQuery files. Start developing the HTML5 and CSS3 after creating all of the directories, files, and subfolders.
Since you’ve completed the PSD to WordPress services yourself and transitioned the existing PSD files to HTML5, CSS3, and JavaScript, it’s time to proceed on to the next step which involves making your HTML a completely responsive WordPress theme. Continue to stick to the WordPress template structure to ensure that your themes are functional – The header.php file comes first, followed by index.php, footer.php, then style.css. The above four templates will be used on all of your site’s web pages.
First, begin dividing the HTML files into sections after you have a complete understanding of how the template hierarchy functions. You can begin by simply creating a directory in your WordPress installation’s themes folder, which is located at /wp-content/themes/. In this file, develop the header.php file. This file could be used to designate the type of document along with all of the components that should appear in the page’s header, such as meta, titles, stylesheets, and javascript. Next, edit the footer.php and drop all of the footer components into your HTML file once you’re through with this. In addition to this, if your website’s layout contains a sidebar, make a file called sidebar.php and incorporate all of the necessary codings in this document.
After you’ve finished developing all of your website’s components in these documents, you can start working on your homepage. This can be achieved in a variety of ways. For instance, you can just create index.php, frontpage.php, or page-home.php; any of these files would suffice for your needs, so the decision ultimately is yours. After you’ve finished designing one of the three homepage templates, make sure to include all of the .php files you’ve just created. Now that you have your top, bottom, and sides ready, paste the HTML5 from your homepage in between them to complete your site’s homepage.
After you’ve effectively developed your WordPress theme, you’ll want to ensure you can customize your webpage from the admin panel rather than having to update the theme file every time you want to make big changes. The add meta box feature is one of the most widely known WordPress operations for making all of your content freely accessible via the WordPress dashboard. Simply create meta boxes for each page’s material and you’re ready to go!
Finally, you must remember that a large portion of internet users view websites on screens that are considerably smaller than the ordinary workstation. Besides, users connect with these websites using their thumbs rather than cursors. As a result, an advanced website must be willing to respond to the numerous types of devices available. This is where the concept of responsive web design comes into play. Developers may create a website that adjusts its entire content dependent on the type of gadget it is being browsed on using responsive design.
All you have to do now is transfer your PSD to WP website from your production server to your live server. To get more assistance on this call Autus Digital Agency at 929-357-3255.

Gaurav Madan, Founder and CEO of Autus Digital Agency, is a pioneering figure in digital marketing with experience of 20+ years. His expertise revolutionizes online marketing strategies and leverages digital platforms for business growth. Gaurav’s consumer-centric approach and strategic vision propel diverse industries to position online presence and dominate.

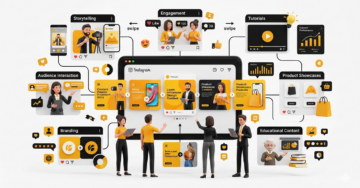
Instagram carousel posts have become one of the most effective content formats for increasing engagement, improving reach, and delivering more value to followers. Whether you are a creator, influencer, marketer, or business owner, carousel posts allow you to share multiple images and videos within a single post. However, many users discover after publishing that the […]
.....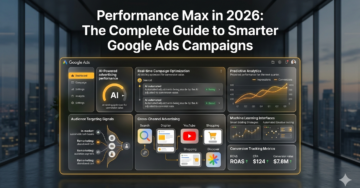
The modern digital advertising ecosystem has evolved significantly, and businesses now rely heavily on data-driven advertising systems like Google Ads to achieve scalable growth. This guide provides a structured, informational breakdown of how to build smarter, performance-oriented campaigns designed to improve ROI, optimize targeting, and maximize conversions across competitive industries. The focus is on practical […]
.....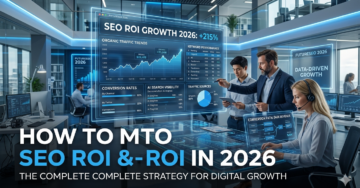
Search engine optimization has evolved far beyond rankings and traffic numbers. In 2026, businesses are investing heavily in SEO because organic visibility directly impacts revenue, lead generation, brand authority, and long-term digital growth. However, one question still dominates boardrooms, marketing meetings, and client discussions: How do you actually measure SEO ROI? SEO ROI, or return […]
.....
SEO Companies in the USA Search engine optimization has become one of the most critical digital marketing channels for businesses aiming to grow online visibility and revenue. In the USA, SEO companies play a major role in helping brands improve rankings, attract qualified traffic, and convert visitors into customers. With search algorithms becoming more advanced […]
.....
In 2026, short-form video content has become one of the most powerful drivers of growth on Instagram. It plays a central role in personal branding, business marketing, and influencer development. Today, video views are no longer treated as a simple vanity metric—they are a key indicator of content reach, algorithm performance, and audience interest. Whether […]
.....
Snapchat is one of the most widely used social media platforms for sharing short-form photos, videos, and disappearing content known as “Stories.” Unlike traditional social networks, Snapchat is built around temporary content that automatically disappears after 24 hours. This unique system has made it extremely popular, but it has also created strong user curiosity around […]
.....
Content has become one of the most important factors for digital marketing in the modern era. If organizations want to stay relevant and gain attention from potential customers through the Internet, then they have to develop their blogs, web pages, social media content, emails, and SEO articles to the highest level. Organizations that consistently produce […]
.....
There has been an enormous increase in the demand for SEO services in recent times because companies have realized that search engine rankings play a crucial role in their ability to generate more sales and lead conversions. The growing pressure on digital marketing agencies to offer effective SEO services stems from this realization by various […]
.....
Search engine optimization has become one of the most important digital growth channels for modern businesses. Whether it is a startup trying to establish market presence, an eCommerce brand looking to increase product sales, or a service-based company focused on generating qualified leads, SEO plays a major role in improving visibility, credibility, and long-term business […]
.....
Today, lead generation is considered to be one of the crucial factors behind the growth of many companies. The current market environment is highly competitive, and attracting clients becomes increasingly difficult and costly each year. In other words, companies do not only aim to get visits to their websites or likes on their pages. Instead, […]
.....
SEO has evolved into one of the most complex digital growth systems in modern marketing. It is no longer limited to ranking websites on Google through keywords and backlinks. SEO by 2026 includes traditional search engines, AI-generated answer systems, and semantic knowledge networks that understand user intent, not just search queries. This transformation has changed […]
.....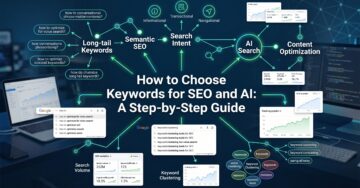
Keyword research is always one of the most crucial aspects of search engine optimization. But with the advent of AI in search, the keyword strategy approach of businesses and marketers has evolved. Search engines don’t care about exact matches of keywords anymore. Today’s algorithms are able to comprehend context, user intent, semantic relationships, and conversational […]
.....
SEO has rapidly changed. In the past, SEO was about improving rankings on the big search engines using the use of keywords and backlinks, among other elements,s to improve visibility on the Google search engine. But that is no longer the case today. As AI-based search engines such as Google AI Overview and Search Generative […]
.....
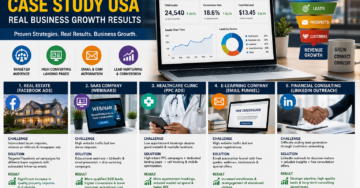
US Client Case Study: 312% Organic Growth with Autus Digital Search engine optimisation (SEO) is no longer a nice-to-have in today’s digital economy; it’s the lifeblood of service-based businesses. The “Yellow Pages” technology is over for agencies that do HVAC, plumbing, and electrical work. The first web page of Google is in which corporations fight […]
.....
The way people discover information is changing fast. More users are now asking AI tools questions instead of typing every search into Google, and that shift is changing how brands need to think about visibility. If you want your content to appear in AI answers, you need more than traditional SEO. You need content that […]
.....
In today’s visually driven digital landscape, where images convey information faster than text, Google image search emerges as an indispensable tool. This feature empowers users to query the internet using pictures rather than keywords, revolutionizing how we discover, verify, and leverage visual content. From academic researchers tracing historical artifacts to marketers sourcing high-quality visuals for […]
.....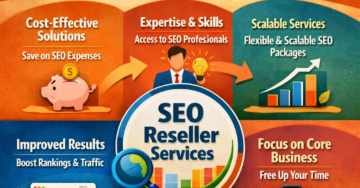
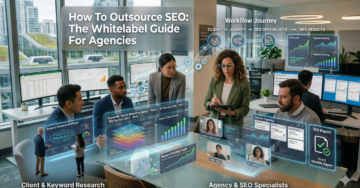
Did you know that companies that outsource their SEO gigs save nearly 30% of costs as compared to handling an in-house team? SEO is a powerful tool but not every business has the expertise of handling it in-house. That’s why hiring an expert SEO reseller in India is worthwhile. It can give you a return […]
.....
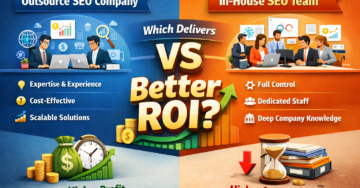
In today’s highly competitive digital landscape, businesses understand the importance of Search Engine Optimization (SEO) in driving online visibility, generating leads, and increasing revenue. However, building and maintaining an in-house SEO team can be expensive and resource-intensive. This is why many companies are turning to outsource SEO companies that offer high-quality services at a more […]
.....
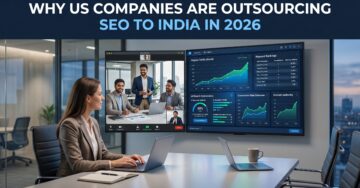
Hey! If you’re scrolling this in 2026 (maybe sipping chai in Delhi like me right now 😄), you’re probably wondering the same thing tons of business owners are: Should I build my own in-house SEO team or just outsource SEO to a solid company—especially one in India? SEO keeps evolving with AI updates, voice search, […]
.....
Google Maps has come a long way from being the basic navigation app it once was: Today, Google Maps contributes to travelers, commuters, and so much more who need invaluable local information. One of its nifty, if underrated skills is the ability to drop a pin anywhere. You can therefore creat custom maps, save destinations […]
.....
Did you know nearly 90,000 WordPress websites are hacked every minute worldwide? Yes, that is the fact. And there are three main reasons for this: weak passwords, outdated plugins, and outdated websites. We all know the importance of WordPress if you run an online store or any other business. It’s the first choice for people […]
.....
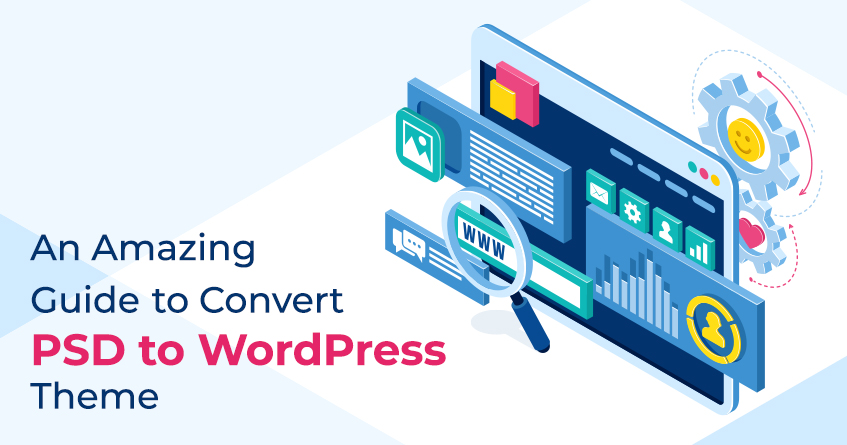
Having a website is critical to a company’s success. Your website must be built using a PHP-based open-source website design platform. WordPress is one such example. With today’s great content management system (CMS), it’s your best blogging companion. However, PSD’s place in a WordPress theme is unclear. Having a PSD to WordPress layout conversion is […]
.....
PSD, also known for the Photoshop Documents created on Adobe Photoshop, are graphic projects created with a few photoshop elements that consist of visuals like layouts, images, and backgrounds without any HTML and CSS languages inputs. PSD templates usually serve as designed layered images, which are helpful for editing without changing the other elements in […]
.....
Undoubtedly, WordPress is among the most popular platforms right now. Whenever a new business thinks of creating their first website or a company that plans to give their existing website a new look – WordPress comes to the mind first. But even WordPress fanatics can’t deny that maintaining a WordPress site is a tiresome task. […]
.....
Building a website requires much more than merely designing a logo and adding a menu, a sidebar, a footer, and content. The components of this jigsaw must first be formed, and this too requires training and practice like everything else. The site design you build must strike the ideal balance between design and function, committed […]
.....
It’s estimated that over 455 million websites run on WordPress. This open-source content management system allows website owners to integrate and use various free and premium plugins to extend the features and functionality of WordPress. “All in one SEO pack” is one such WordPress plugin that is most popular and widely used by heaps of […]
.....
WordPress websites are abundant on the internet. 8 out of 10 developers probably use WordPress for website development. One of the most popular and user-friendly CMS, WordPress comes with some really interesting and customizable features, which makes website development fun. It is quite obvious that you would want your WordPress website to look different from […]
.....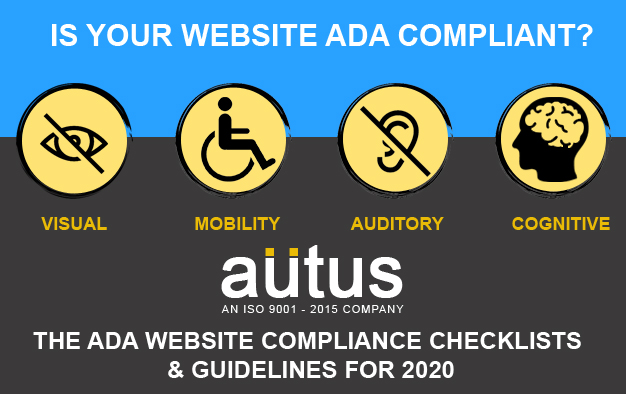
Creating a professional website for their brand tops the priority of every business owner. Just because your website is easy to read and simple to navigate does not mean everything is fine. Business websites must be ADA compliant. First things first, what is an ADA-compliant website? Put simply, an ADA-compliant website can be accessed by […]
.....
Business organizations looking to make a global impact have to have their professional website. Companies are shelling off, quite handsome amounts for developing interactive, dynamic, and attractive websites. For professional website creation and development, you will need developers and designers with specific skill sets. In such an aspect, PSD to WordPress theme conversion acts as […]
.....


